PRESETS
Autocomplete
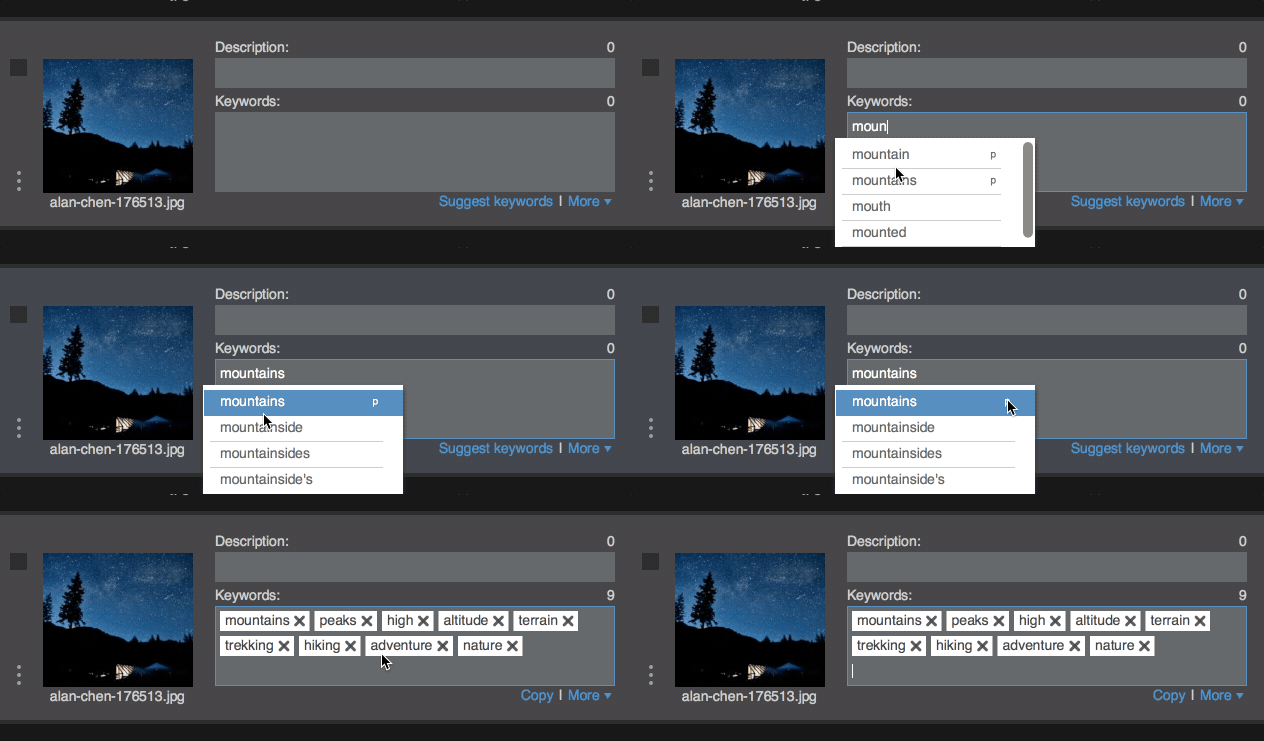
You can insert presets via autocomplete when you type in the keywords fields. There’re two main ways to do it.
First - you start typing ordinary words which should be part of a preset name. When you see little “p” letter on the right - you know it’s a preset. Now when you select it and press “Cmd+Enter” (Ctrl+Enter on Windows) you will insert preset with this name.

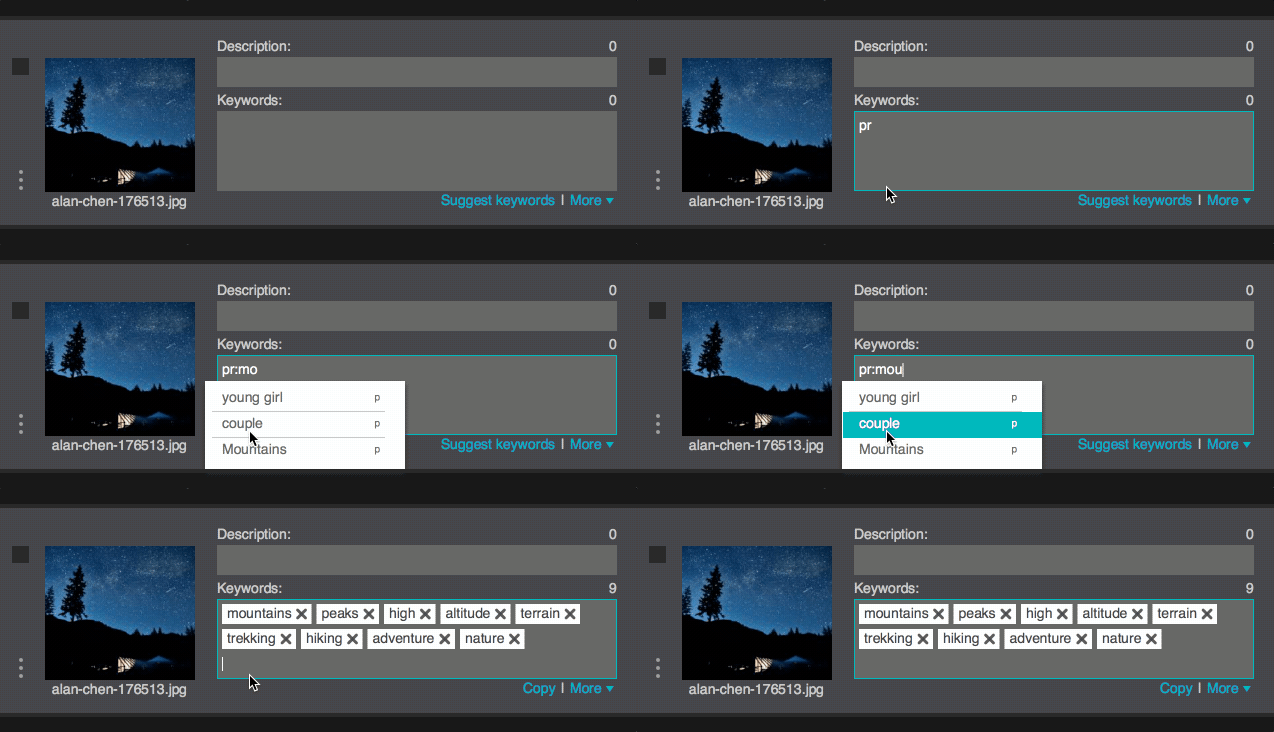
Second - if you will type “pr:” (without quotes) in the Keywords field you will start autocompletion only for Presets. That is if you type any characters after “pr:” Xpiks will autocomplete not just English words, but only preset names (you can tell that because all the items have little “p” on the right). Now it’s enough to select and press just “Enter” (instead of “Ctrl+Enter” as for previous way) to insert this preset.

