In May 2022, I was super excited to finally get my hands on a DJI Mavic 2S drone. Six months on, according to the DJI app, I’ve recorded over 35 hours of flight-time having captured hours of footage and hundreds of stills. Naturally, since the “early days” they’ve all been meticulously uploaded to various microstock agencies with some starting to sell.
In this blog post, I’ll happily discuss what I’ve learned during the past six months so that you may soon to get you started on your drone adventure. Even if you’re already a drone pilot, these tips may prove valuable.
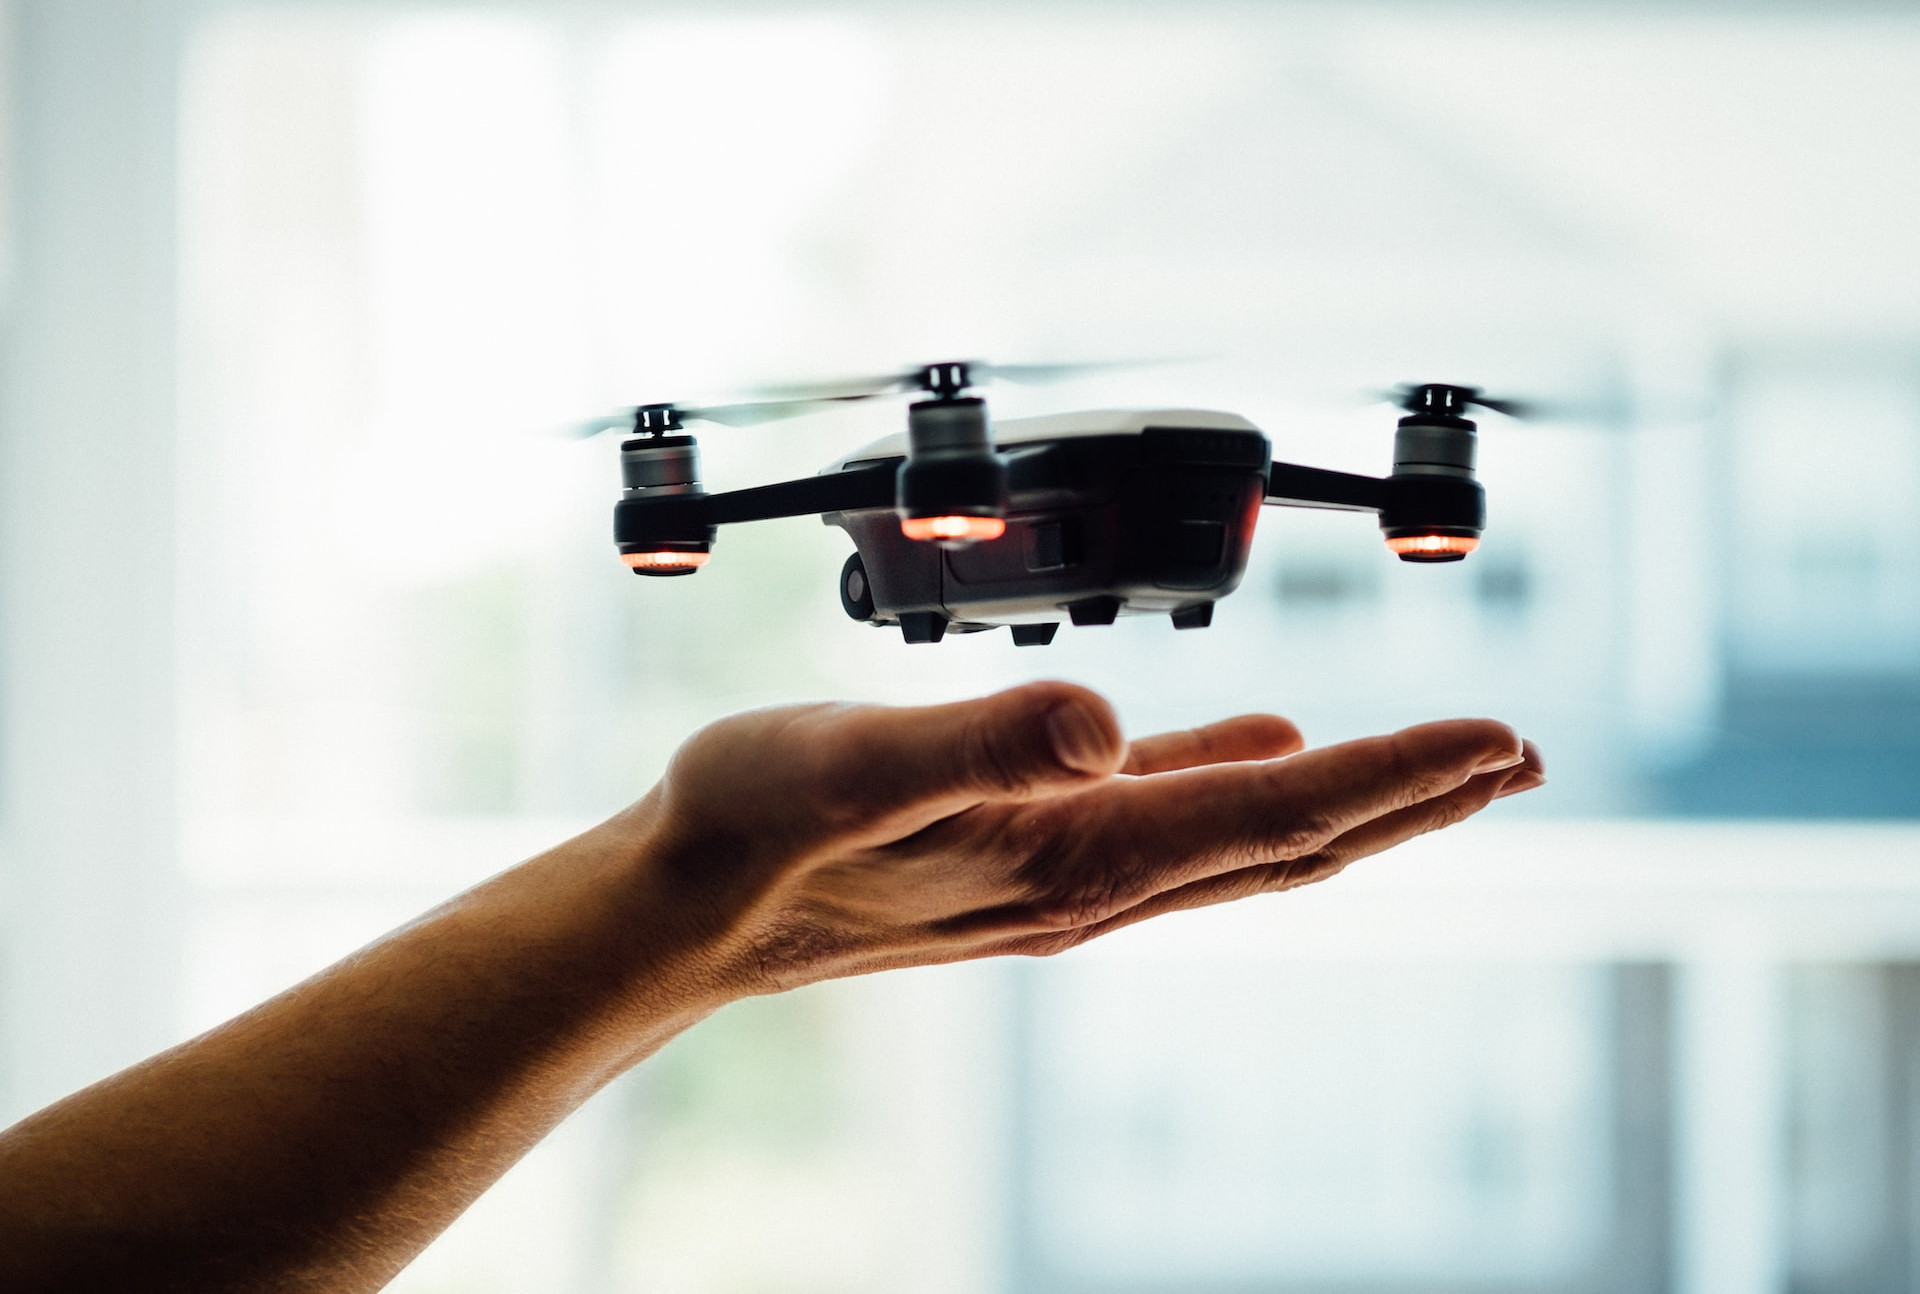
Getting a drone
Obviously, the first step in your drone journey is to select a suitable drone for you. In late-2022, there are literally dozens of options available and more on the way as it’s a fast-moving industry with a huge scope. The most recent and hot off the shelves are: DJI Mini 3 Pro and DJI Mavic 3 Classic with impressive specs as seen below for the latter.

What may be a right drone for you should depend on a multitude of factors, such as:
- Your budget: Consumer drones vary from small plastic “toys” at around
$100to professional consumer drones at upwards of$3,000; - Your flight experience, if any: Certain drones may be easier to learn than others, such as the lighter DJI Minis. Should you crash a light drone it’s unlikely to do much damage or hurt someone which can’t be said about the heavier drones;
- Your shooting style: Are you planning to shoot primary footage or stills…or perhaps a mixture of both like myself? Or you would like to experiment with immersive FPVs (First Person View) type drones; and
- Your country-specific regulations: As a rule of thumb, a sub 250 gram drone, such as a Mini 3, will have fewer regulations (e.g. to fly under the A1 class in Europe) than a heavier drone such as the DJI Mavic Air 2 that weighs just over 500 grams.
Fortunately, PCmag has looked at all the options and published a recommended list for drones depending on the above factors which is worth checking out to guide your decision-making.
Which drone did I choose and why
I opted for the heavier DJI Mavic 2S for two main reasons:
- Since I’m flying on or near the Portuguese coast, I needed something that handles the wind well. I tested my friend’s Mini2 and it just didn’t handle high winds well. In fact, any windspeed above
25km/hit was already receiving multiple wind-warnings advising the drone return to home; and - As I’m really into aerial photos with many being targeted for potential book covers, I required a larger sensor for the highest resolution, which would also perform well under lower-lighting conditions. I can safely say that the 1inch sensor on the 2S has a superb resolution for stills as you may see below of this top-down shot of a stranded wooden boat on the idyllic beach.
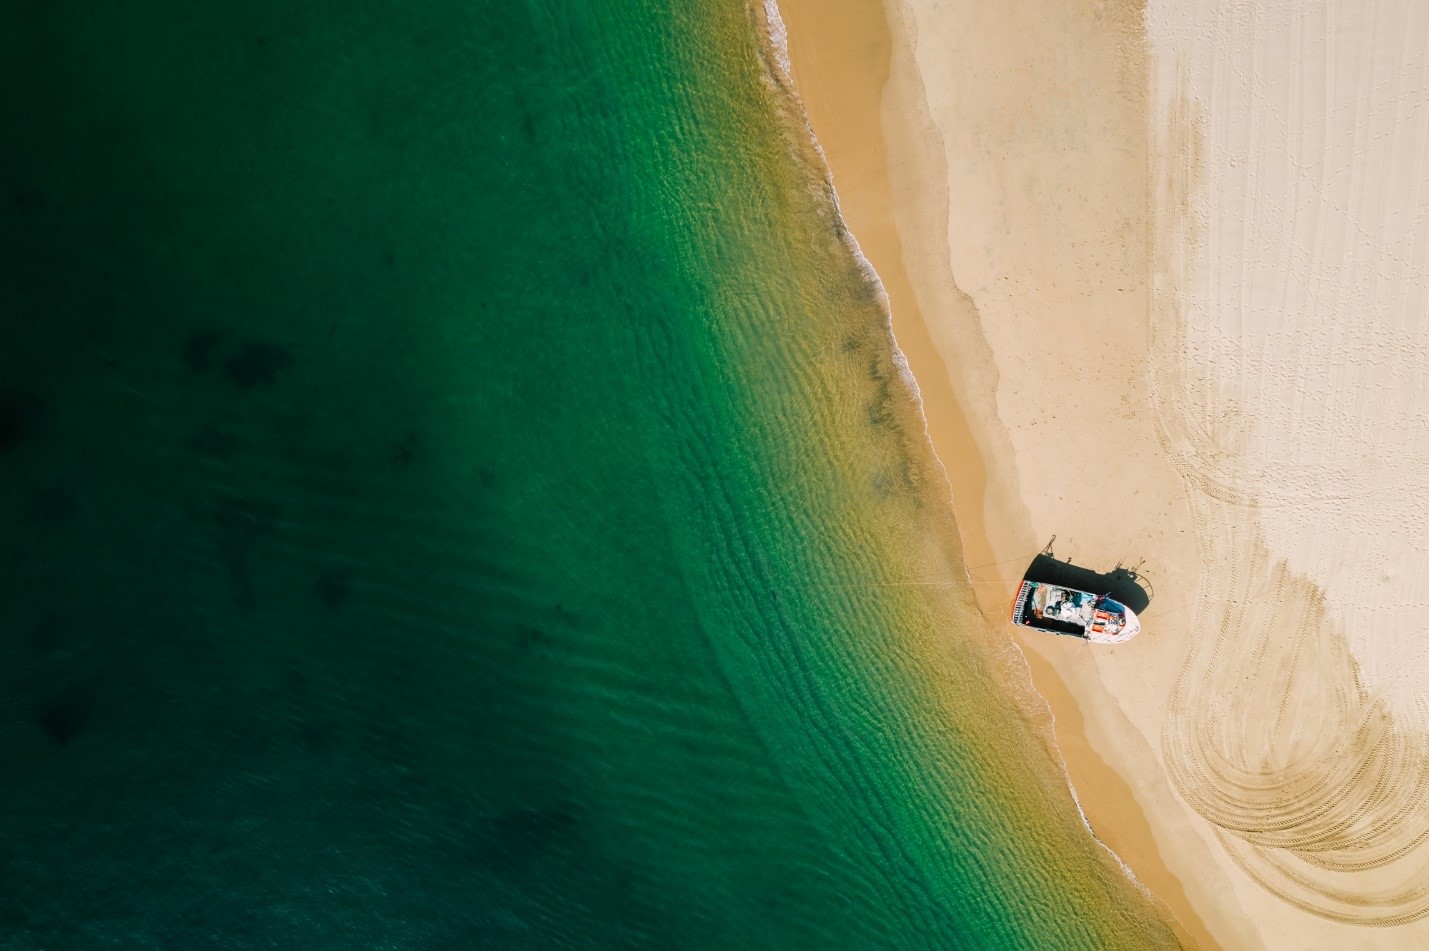
Shot taken with 2S
Drone regulatory compliance
I admit that the first thing I wanted to do when I got my hands on a drone was to fly it into the distance even if I had near zero flying experience. Could you really blame me?
Within a few days, even without any flight experience or a license, I flew it anyway. God-forbid if I were to have had an accident involving damage to property, personal injury or flew in / close to a restricted zone (such as an airport) I could have landed myself in hot water with fines.
Fortunately, I had no such issues but not wishing to take any further chances, within a few weeks I applied to undertake the free A1/A3 (Open Category) online multiple-choice exam. This qualification would allow me to fly throughout the European Union for five years under the above categories.
A1 / A3 open category exam in EU
Now, some information about the exam itself. The Open Category A1/A3 online theoretical knowledge examination that you can take in the comfort of your home consists of 40 multiple-choice questions on the following subjects:
- Air safety;
- Airspace restrictions;
- Aviation regulation;
- Human performance limitations;
- Operational procedures;
- Drone general knowledge;
- Privacy and data protection; and
- Insurance and security.
To pass the exam, you would have to answer correctly at least 75% (30/40) of all the questions. You may re-take the test up to three times. It’s a tricky exam since many of the multiple-choice answers are similar with one being more correct than another. I studied hard, capturing many screenshots of the slides to go back and memorize the material.
I eventually passed it on a second try. After receiving my certificate, there were still a number of administrative steps that I won’t bore you with (such as registering as an operator / pilot with the national aviation authority and requesting authorizations for individual flights).
A2 open category exam
As my drone is on the heavier side at just over 500 grams, in June, I undertook and passed the A2 exam at the Portuguese National Aviation Authority office near the Lisbon Airport. With the A2 license, I could fly closer to “uninvolved people”, in fact, a minimum of 5 metres horizontally (at low-speed) or 30 metres at normal/high speed. This is hugely better than a minimum of 150 metres under the A3 category.
The exam questions were similar to the A1/A3 exam but went into more details specifically covering:
- Meteorology;
- Drone flight performance;
- Battery usage; and
- Technical and operational mitigations for ground risk.
Again, a 75% pass rate was required and this time I passed on the first try saving me another trip to the Lisbon airport region.
Summary of flying restrictions
Below is a summary of the restrictions from each category which may make your buying decision easier. Keep in mind that the rules will be changing at the beginning of 2023, although seems that the rules been pushed back by a year – more details here. The changes have mainly to do with CE classification on drones sold post 2023.

Flying restrictions per A- category
Important to be compliant!
So, although it’s a pain, I highly recommend you going through the regulatory process. Flying a drone, especially in the beginning when you’re less experienced / confident, can be stressful enough. This stress can be multiplied by not having all the paperwork in order as thoughts can race through your head about what can go wrong.
Perhaps also something to consider is that if you’re uploading your “illegally captured” content to stock agencies and social media it’s already a clear sign of rule-breaking. Not sure how active some authorities are in tracking down on such individuals but I rather be safe than sorry.
All in all, again I highly recommend you jump through the hoops so you’ll have a trouble-free adventure. Of course, the rules and regulations differ on where you live, so do you research. It’s also a fast-moving regulatory field, so it’s important to keep up to date with the latest rules as ignorance is not an excuse.
Flying with your drone
Fly safety
Just because you passed an exam or two and have a certificate doesn’t mean that you’re out of the woods. Just like getting your driver’s license doesn’t automatically turn you into a competent driver, next, you’ll need to learn to fly safely and avoid disastrous situations as you can see in this YouTube video.
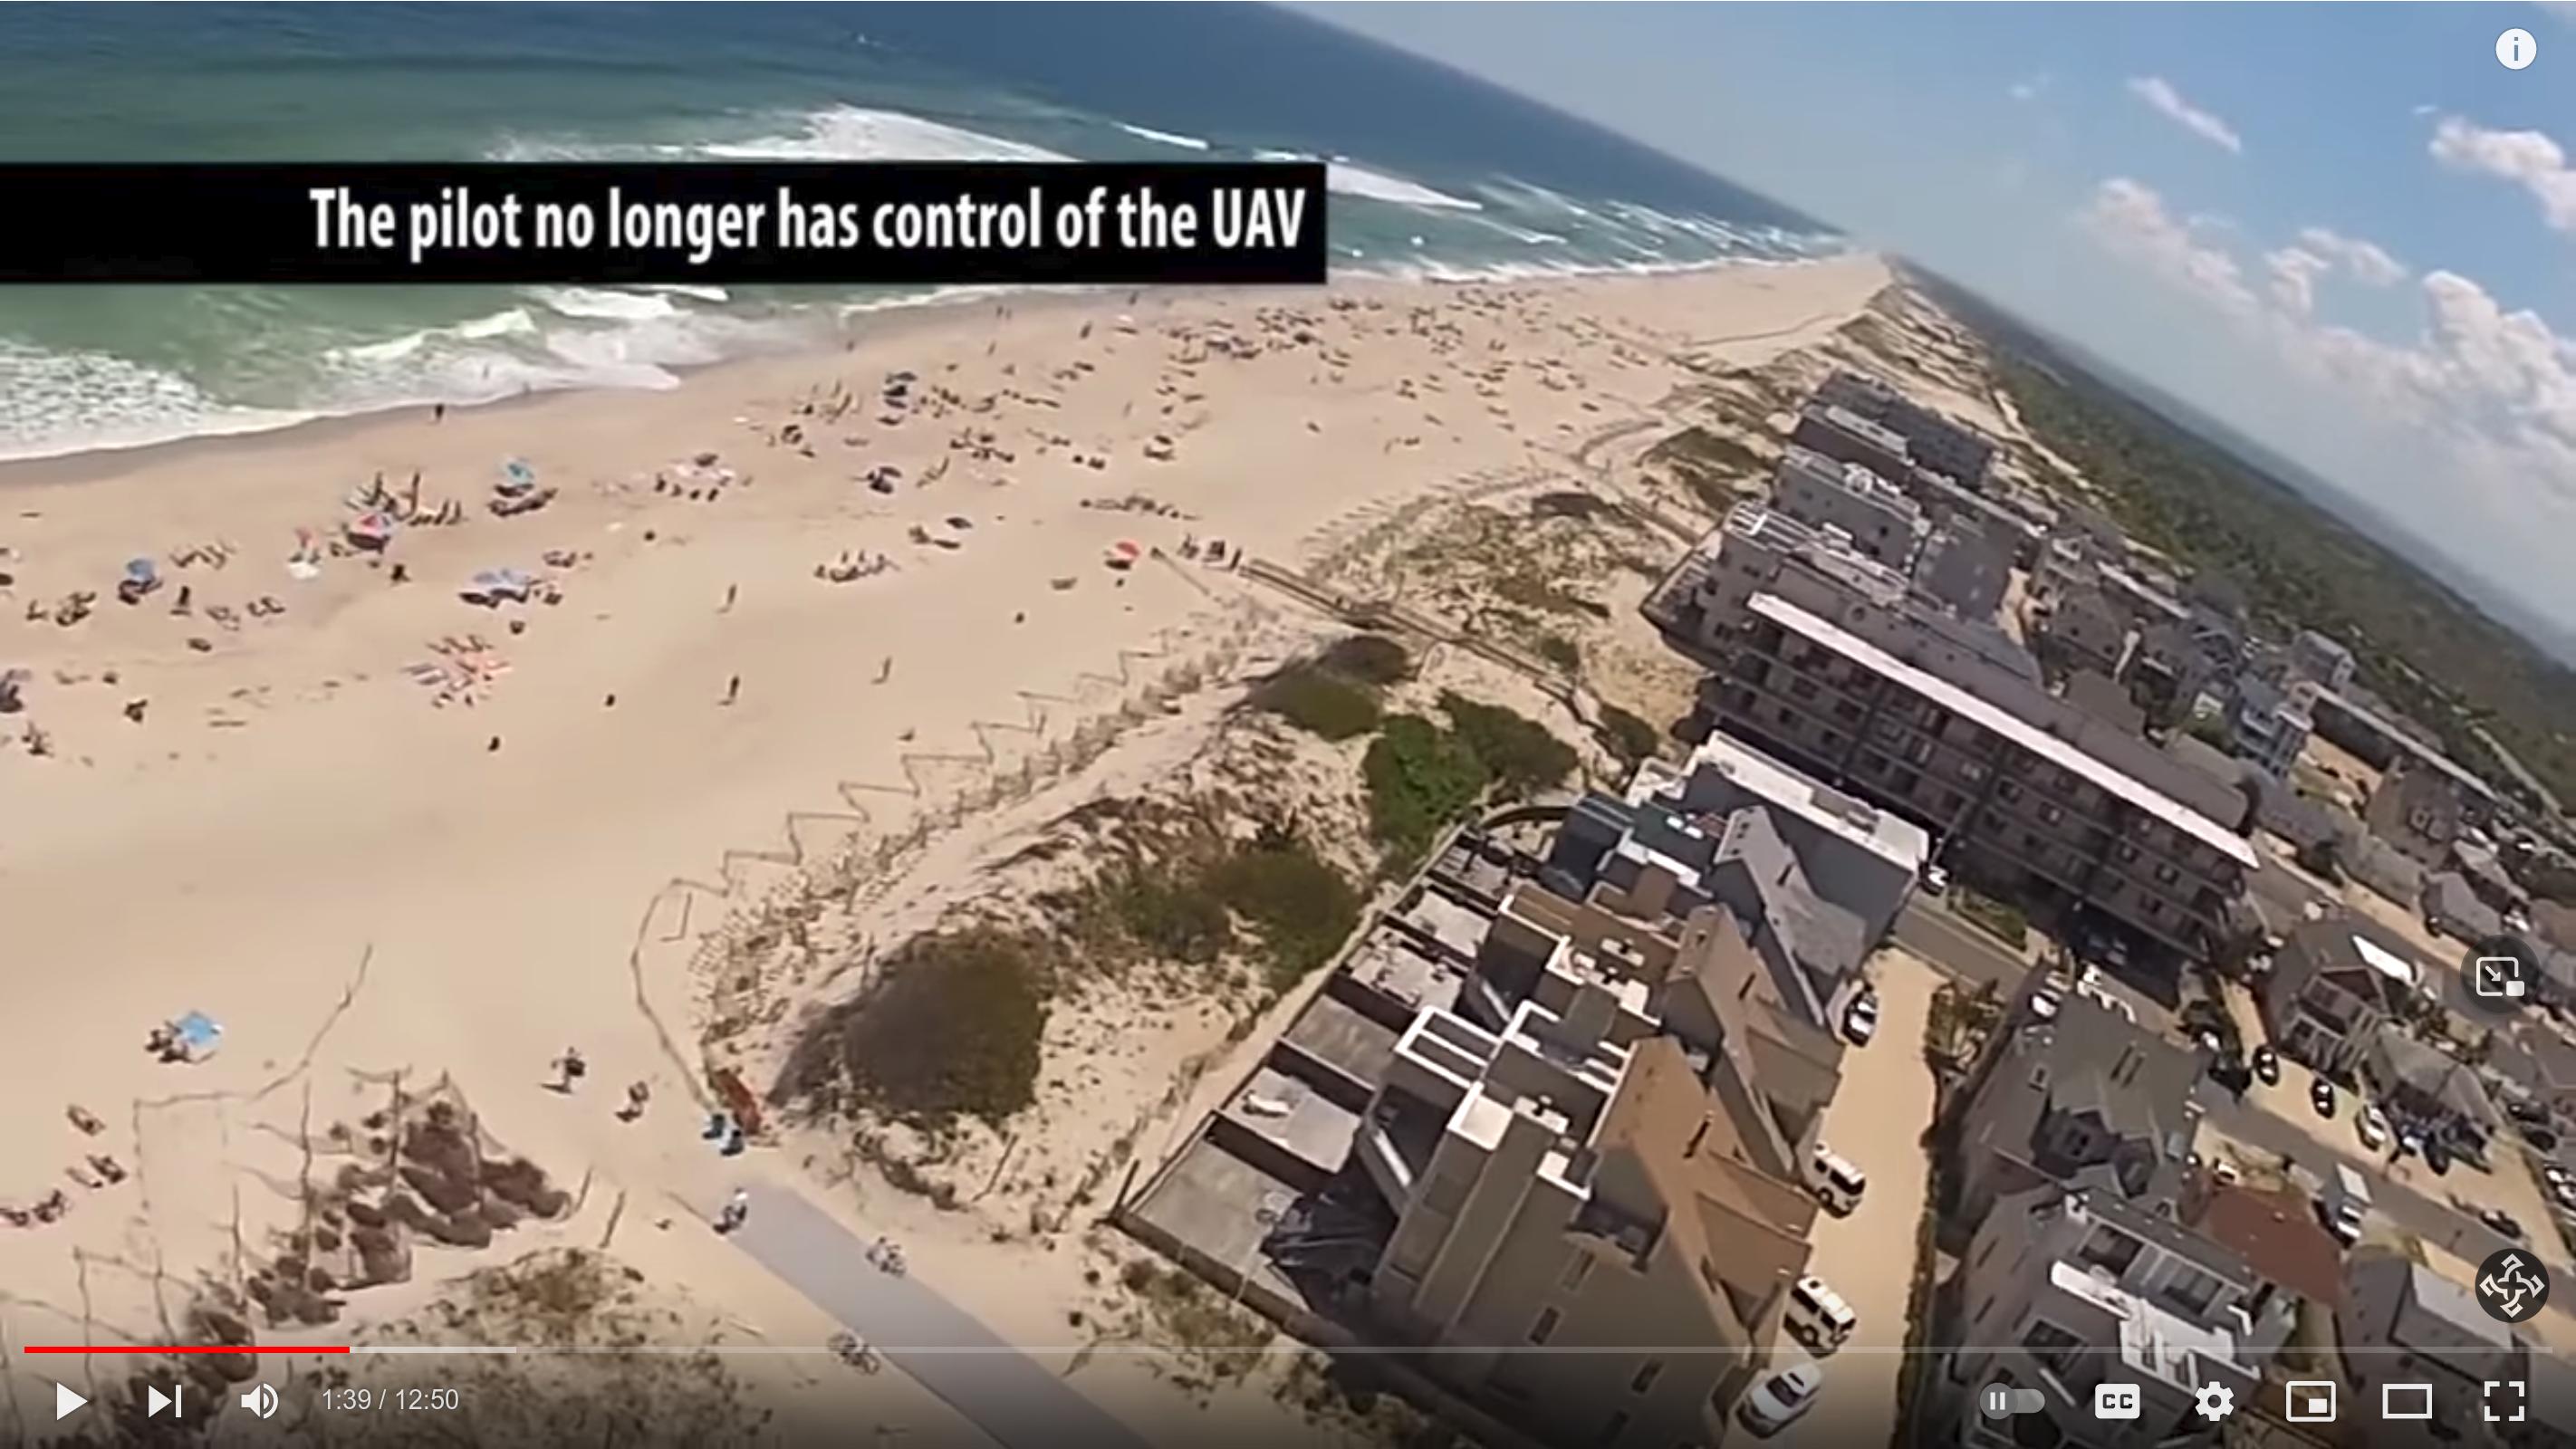
The pilot looses control over UAV
Fabio Nodari’s created an excellent pre-flight checklist in his Guide to Drone Photography blog post at Gallerist that I’m happy to share here:
- Fly Zone: check local regulations and if there will be people in the area;
- Weather: check the weather in advance. Nothing worse than heading to a place only to find out you can’t fly because the wind is too strong or there’s a risk of heavy rains;
- Battery: I had no idea it took so long to charge the batteries. When you plan your trip remember to have enough time between the shootings to fully charge all your batteries;
- Settings: as discussed, familiarize yourself with all of the drone settings including the camera settings. Remember to format your SD card and save your pictures as RAW files;
- Propellers: check the status of your propellers and always bring some extra more of them. If one of them seems to be cracked don’t risk: it’s cheaper to buy a new set of propellers than to lose a drone;
- Motor: is it making some weird sounds? Pay attention to it when you take off; and
- Controls: some drones come with a dedicated remote controller (an option that I strongly recommend) while most use your phone. If you are using your phone, remember to close all the other apps and fully charge it before heading out for the shooting.
Oh, and I’ll add two more to Fabio’s fabulous list, which are:
- Learn to how avoid aggressive birds: I’ve had some close calls in the past few months, particularly with seagulls. The trick is fly higher than them and avoid nesting places.
- Don’t fly in “Sport-Mode” (at least not until you have more experience): My Mavic Air 2S in sport mode can fly up to
68 km/hour, but obviously I’ll have less reaction time. Most critically, all obstacle avoidance sensors are disabled when using Sport Mode. In addition, this mode will drain your battery life quite quickly so you may not want to be too far out.
Learn the basic drone moves
After you’re feeling more confident and hopefully flying within the rules, the next step is to learn some basic moves to record when thinking about the types of content that footage buyers are looking for. In the beginning it’s normal to want to do too much too soon. Ultimately, buyers prefer quite simple moves that fit into their storyboard, such as a “simple reveal” or “pull-away”.
Here are six popular drone moves and what they mean:
- Pull-away: This type of shot is easy to capture and always looks cinematic. Start by hovering your drone in front of the subject and then gradually move back and up;
- Panning: Simply rotate the drone, left or right, across the landscape at 360 degrees;
- Tracking: Here, you’ll need to match the speed and able to maintain the focus on your subject at the needed composition point;
- Reveal: Pretty much what the name entails, eventually in the sequence you’d uncover the subject. This can be done with various techniques such as flying backwards until the subject appears or appearing suddenly when it was hidden behind something (such as behind trees or a wall);
- Top-down: This is a popular type of shot when you tilt your gimbal close to 90-degrees downwards; and
- Orbit: A more advanced move requiring you to rotate the drone while sliding left or right, keeping the drone camera facing the object of interest. The drone essentially launches into a smooth orbit around this object. While it can be tricky to do manually, some drones offer a Master mode option that will let you select a distance and automatically fly a circle around that point.
Avoid too-fancy moves
An aerial hyper-lapse looks great and will get you lots of views on social media but, unfortunately, it’s not the most commercial of shots as they’re trickier to fit into a buyer’s storyboard.
Further resources on the types of moves buyers are looking for
The following YouTube video pretty much nails some of the beginner cinematic moves that look great.
Also, worth checking out further fantastic tips by Richard Brooks over at the Pond5 Blog.
Research where to fly using online maps
Although my drone can fly up to a good 20 minutes (less if it’s very windy and/or hot out), you may find that you waste a lot of time scouting for a great shot while up in the air. Therefore, to save battery life as well as your time, it’s a good idea to research spots and angles you may want to shoot beforehand. So, you’ll be able to launch close to the target location and quickly get there so you’ll have more time to get the best shots.
The go-to software is Google Maps and I’ll illustrate with a practical example that may one day turn into a book cover (fingers crossed):
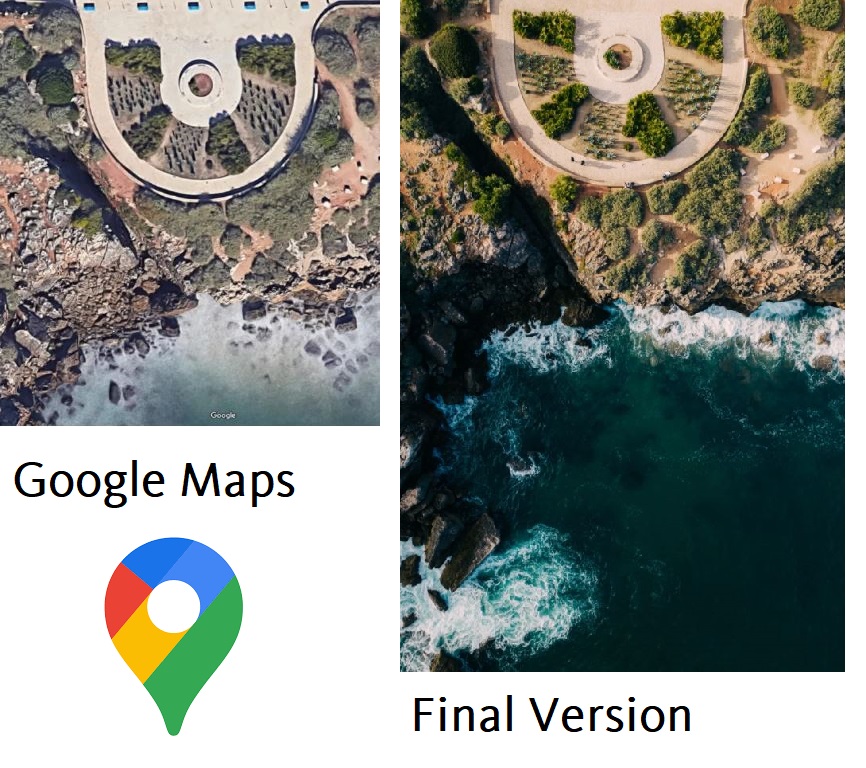
Using Google Maps for finding good places
Taking photos and recording videos
Be aware of the Exposure Triangle
Technical considerations are fundamental and applying the classic footage rules, ensure that you’re using the correct settings within the exposure triangle. This may mean that you’ll need to put on a Neutral Density filter to block some of the light.
Technical tips for drone video
Also, a good idea to keep your clips relatively short, at a maximum of 40 seconds. As for resolution, you may choose to shoot in either ProRes (RAW footage equivalent) or 4K or higher. Frame rate is really up to you but be consistent. I tend to shoot at 24 FPS as it’s the most common in Europe, but should be no issues if you would like to shoot at 25 or 30 FPS. It’s probably best to avoid 60 FPS and higher unless done deliberately with a goal in mind such as slowing down the footage later.
Head over to the detailed video technical guide in this blog for more details.
Taking still pictures with a drone
When it comes to capturing stills, always shoot in RAW format to have the most flexibility when post-processing. Nothing beats a great top-down shot, but also try out other cool features such as a 180-degree panorama, which my 2S does magically by combining 21 images. Here’s the one I captured at Lisbon’s Commercial Square at sunset – more on creating these later.

Submitting to Microstock agencies
Handling large files
My workflow for uploading drone content to microstock agencies hasn’t changed, but what has changed is that my hard-drive quickly fills up as the files are HUGE. We’re talking about a 1-minute video being over 1 Gigabyte. Also, the RAW 250-images of a hyperlapse would be over 9 Gigabytes, for example.
So, I’ve had no choice but to invest on a 5 Terabyte external hard-drive which is also filling up quickly! Fortunately, they’re not too expensive these days at around 100 euros.
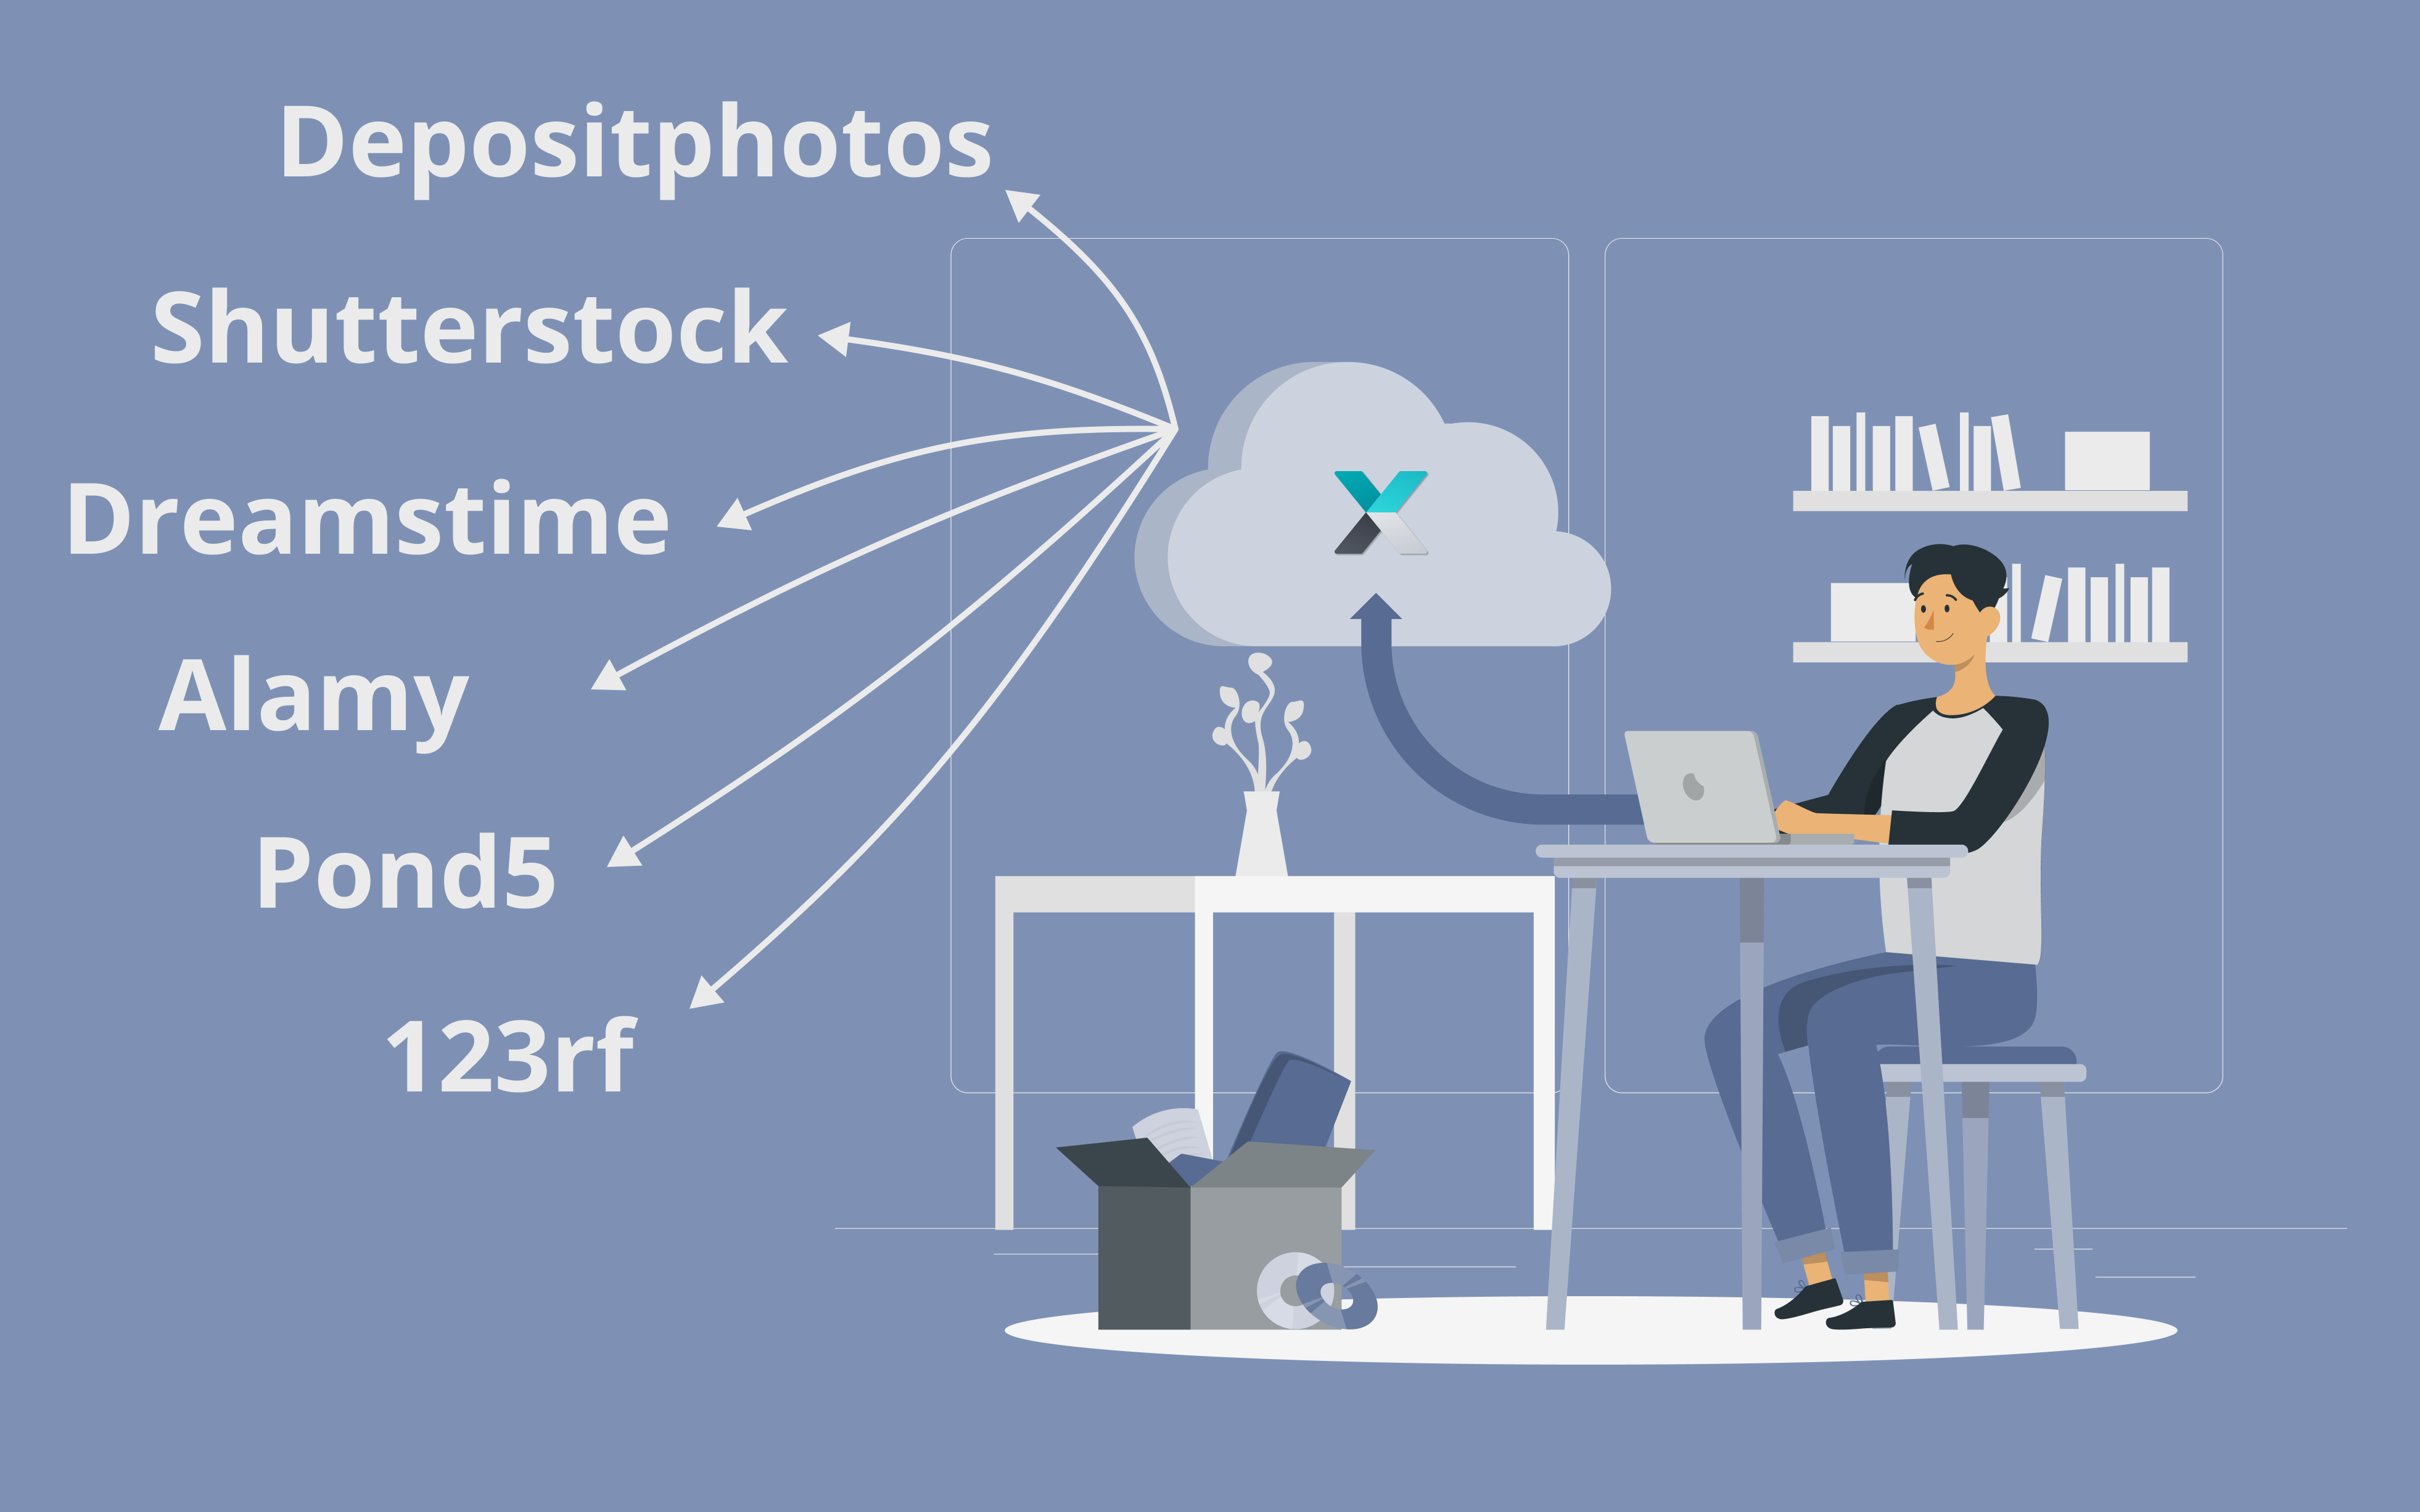
Uploading 'heavy' videos using Xpiks Cloud
As we’re talking about huge files north of the 4K, most of these agencies accept FTP transfer that you could do with Xpiks. If you’re uploading to many agencies at the same time, it’s the best to use Cloud Upload as you would upload each file from your computer only once and Xpiks Cloud will fan out to the agencies later.
Select right microstock agencies for your content
Although almost all microstock agencies accept (drone) footage you may want to double-focus your efforts on a few that would have a higher chance of success. These include: Pond5, Adobe Stock, Shutterstock and iStock. The rest just aren’t worth your time in the beginning. Of course, there’s no harm to uploading to them if it doesn’t take up much of your time as you may have a sale on one of the smaller sites too. Once you have more flying experience under your belt, you may also want to consider a niche footage agency, such as Overflightstock.
Post-processing aerial video
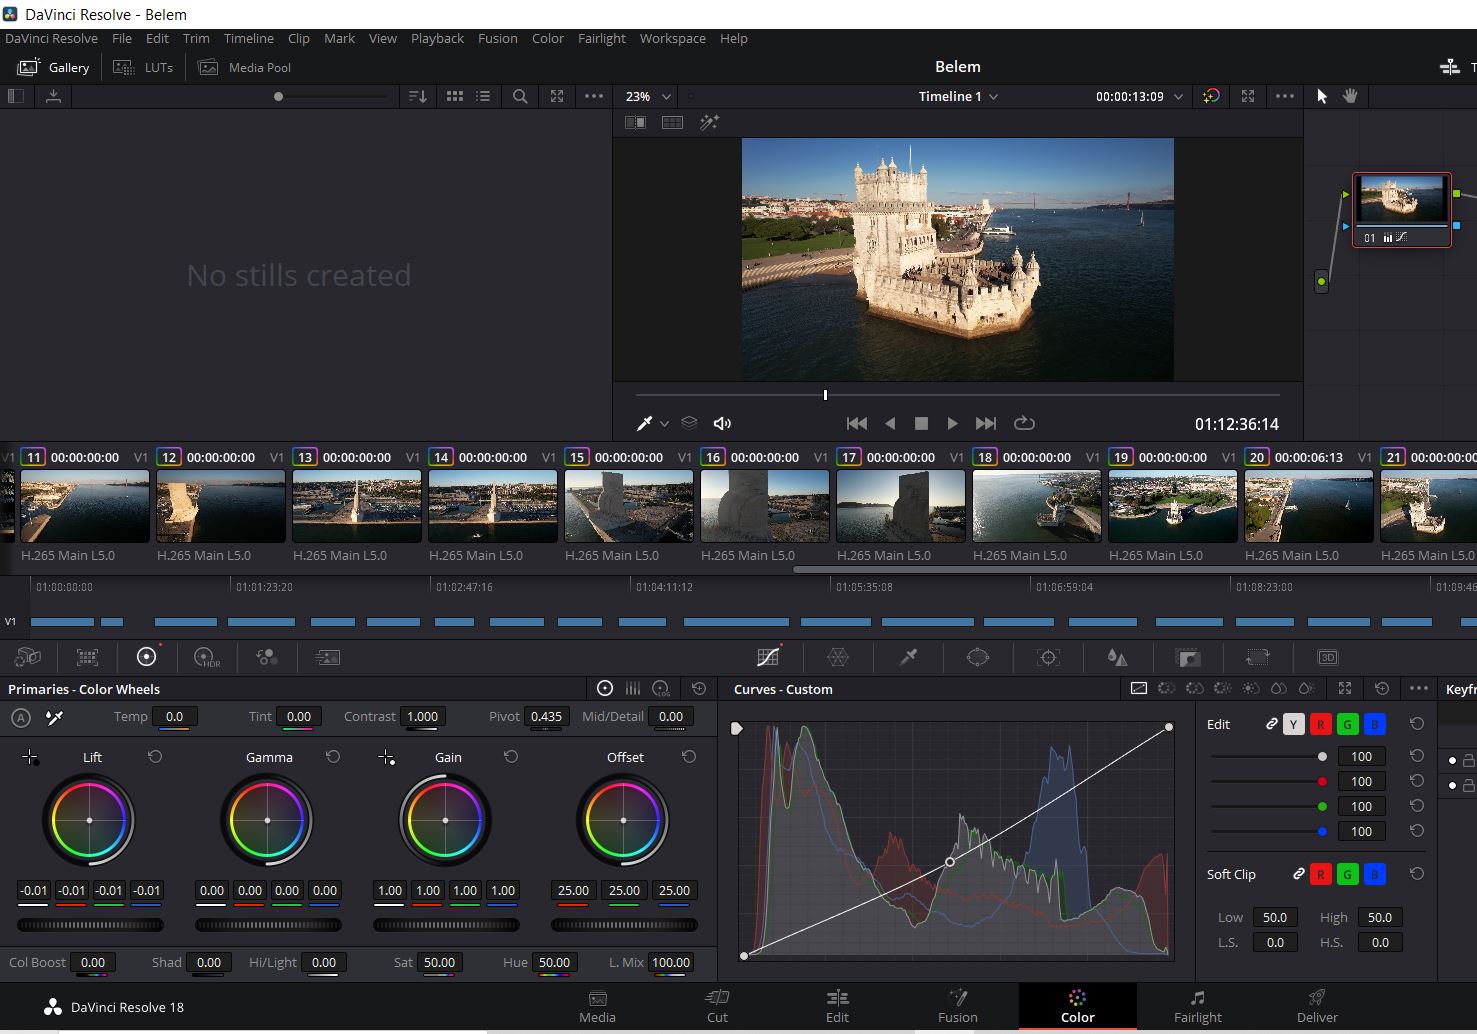
Post-processing video in Da Vinci Resolve
As for post-processing, I’ve kept my workflow relatively simple with Davinci Resolve for footage.
Most of my corrections are quite basic and consist of the following two:
- Trimming the video to capture the most interesting parts. Note that I always like to begin and end the video with the drone completely static in the air as this would aid a buyer in fitting into his/her project’s timeline; and
- Basic color correction: Making the clip pop a bit in the thumbnail is fundamental so a buyer will look further and potentially license the clip.
Post-processing aerial stills
As for post-processing aerial still images, I always shoot in RAW and post-process using both Lightroom and Photoshop. Depends on whether I’ll be submitting the content for microstock or book covers but overall, I tend to take longer to post-process these than videos. Most of my time is taken up by cloning out people and logos in Photoshop so the content can be submitted as commercial.
Creating aerial panoramas
Top of the line drones can create fantastic panoramas. They can be time-consuming to create in Lightroom as you’ll be stitching upwards of 21 images together. However, it’s well worth the wait as the results can be fantastic and should sell regularly, such as the following recently captured in Lisbon’s Discoveries Monument.
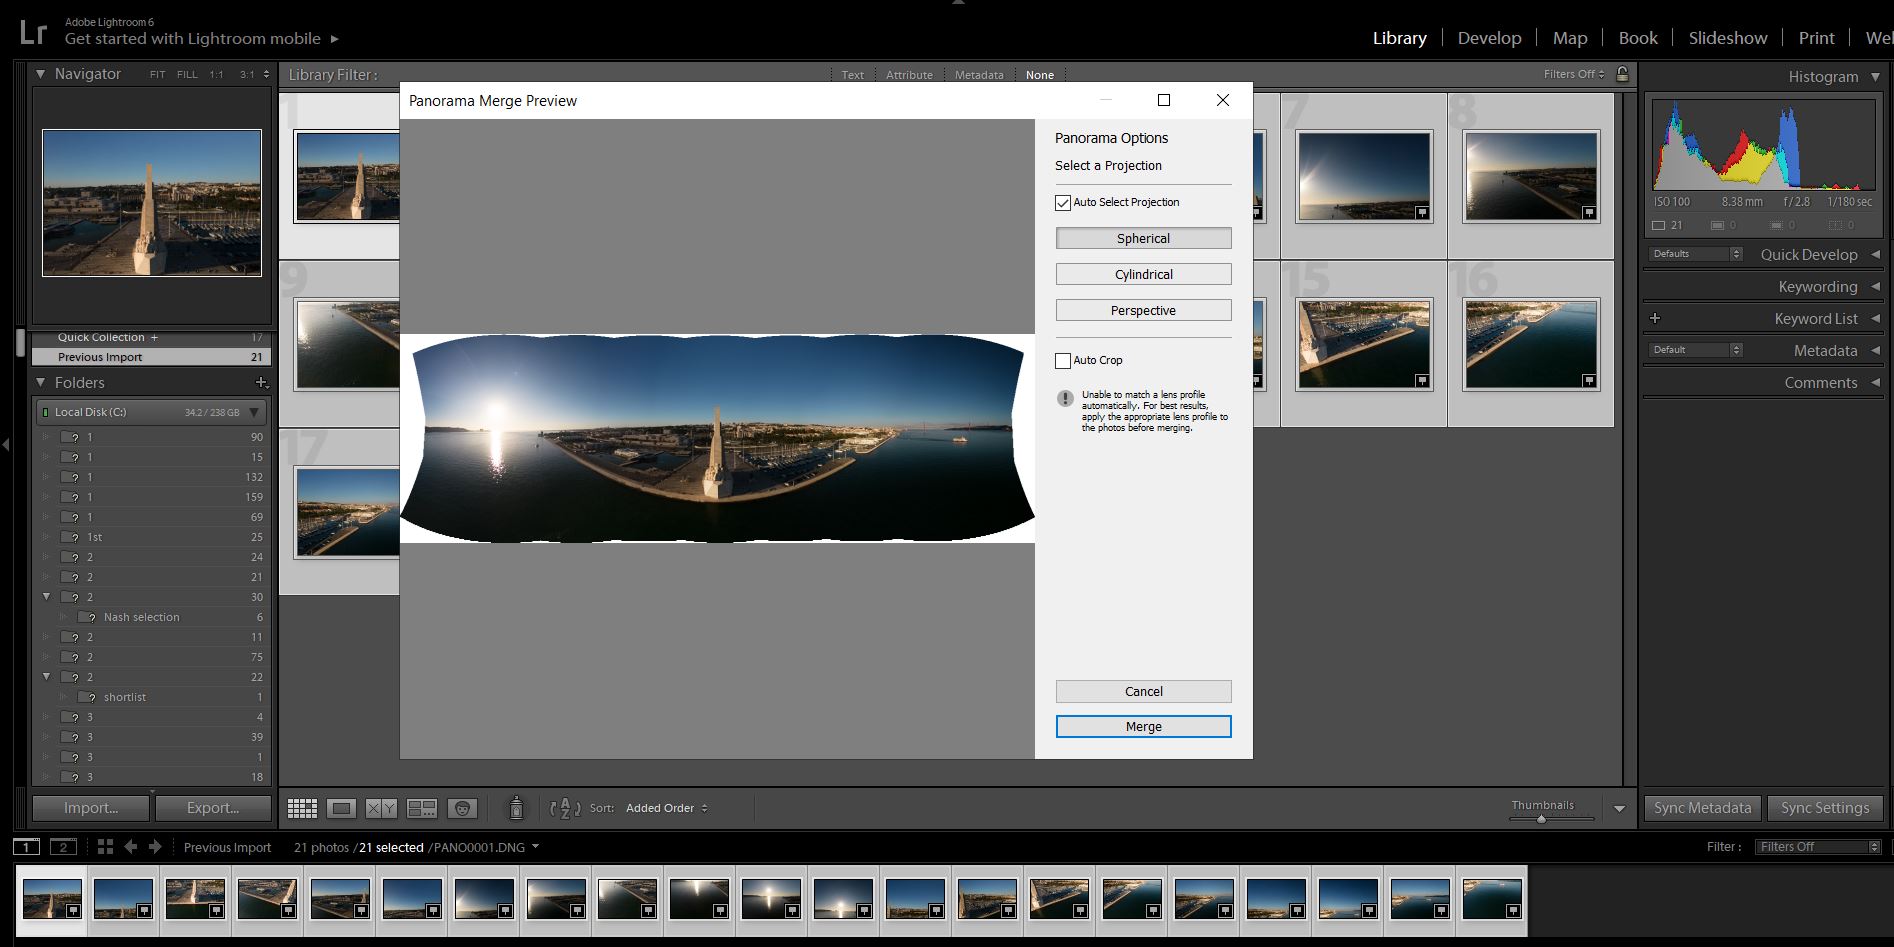
Creating panorama in Lightroom
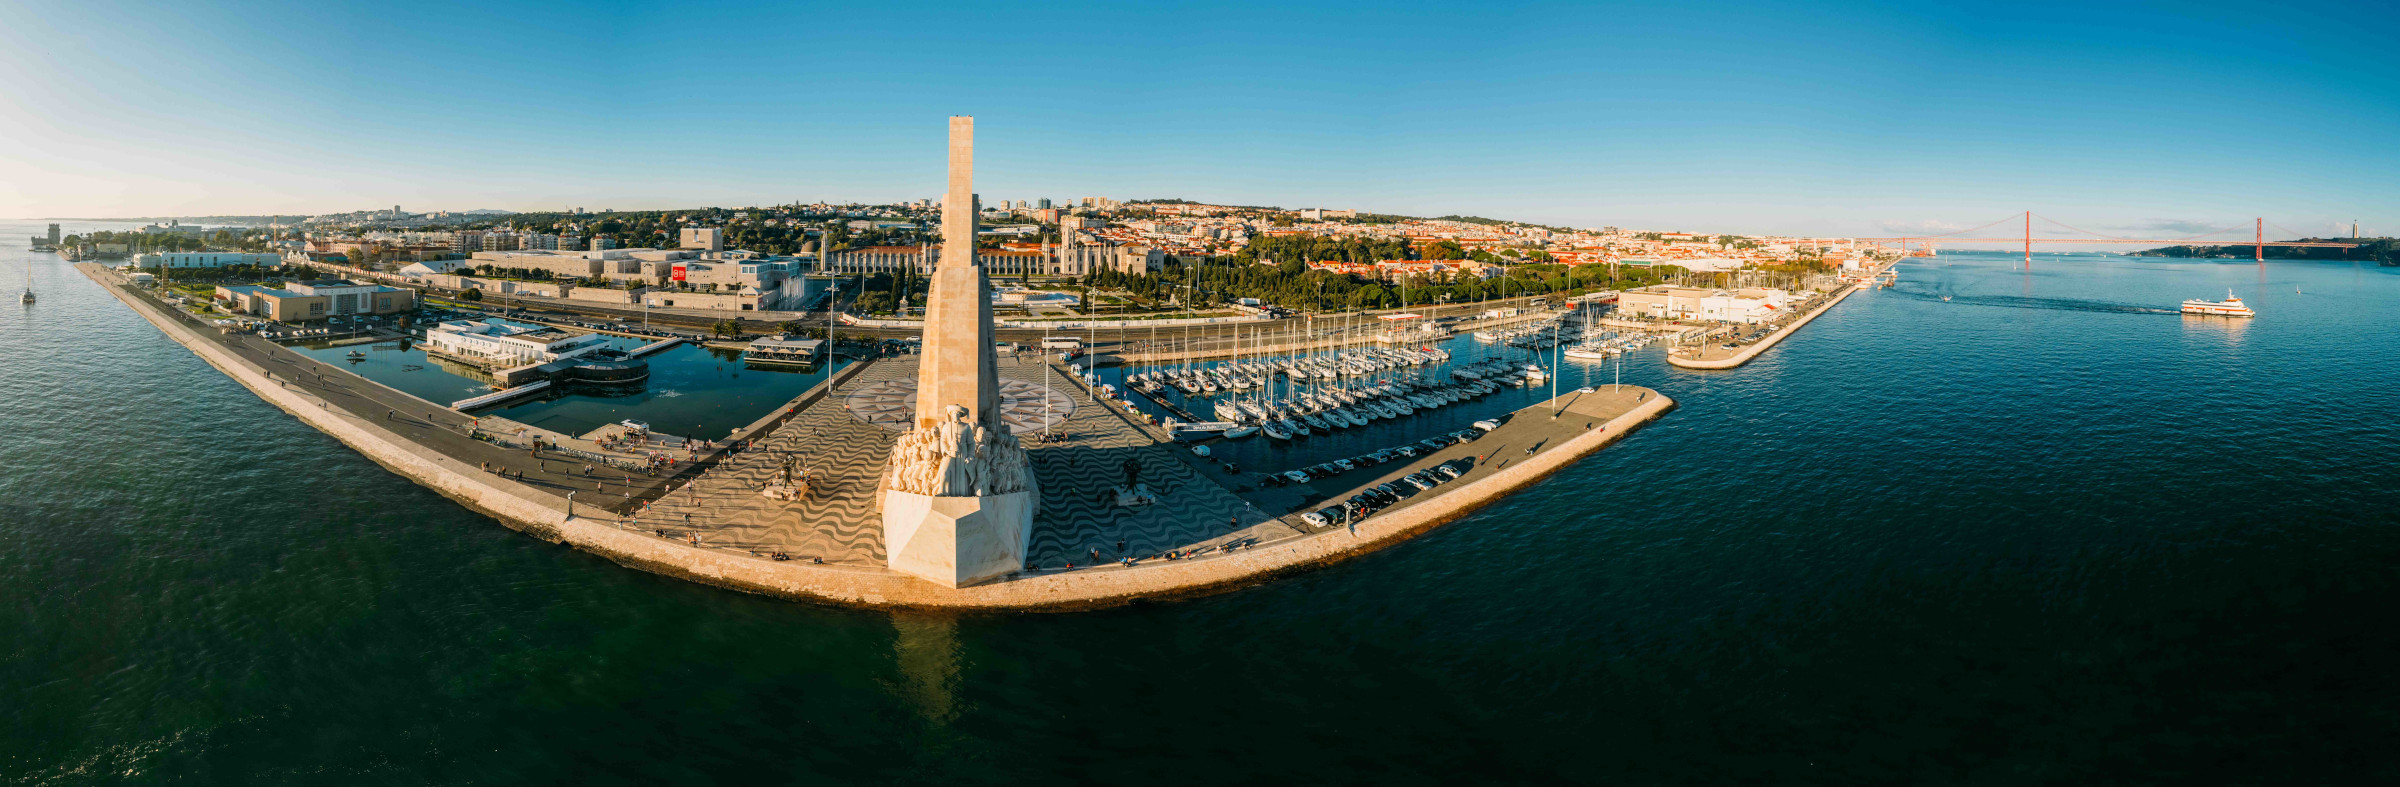
Panorama result
Here’s a step-by-step guide on YouTube on how to create panoramas in Lightroom and Photoshop.
Keywording tips for aerial content
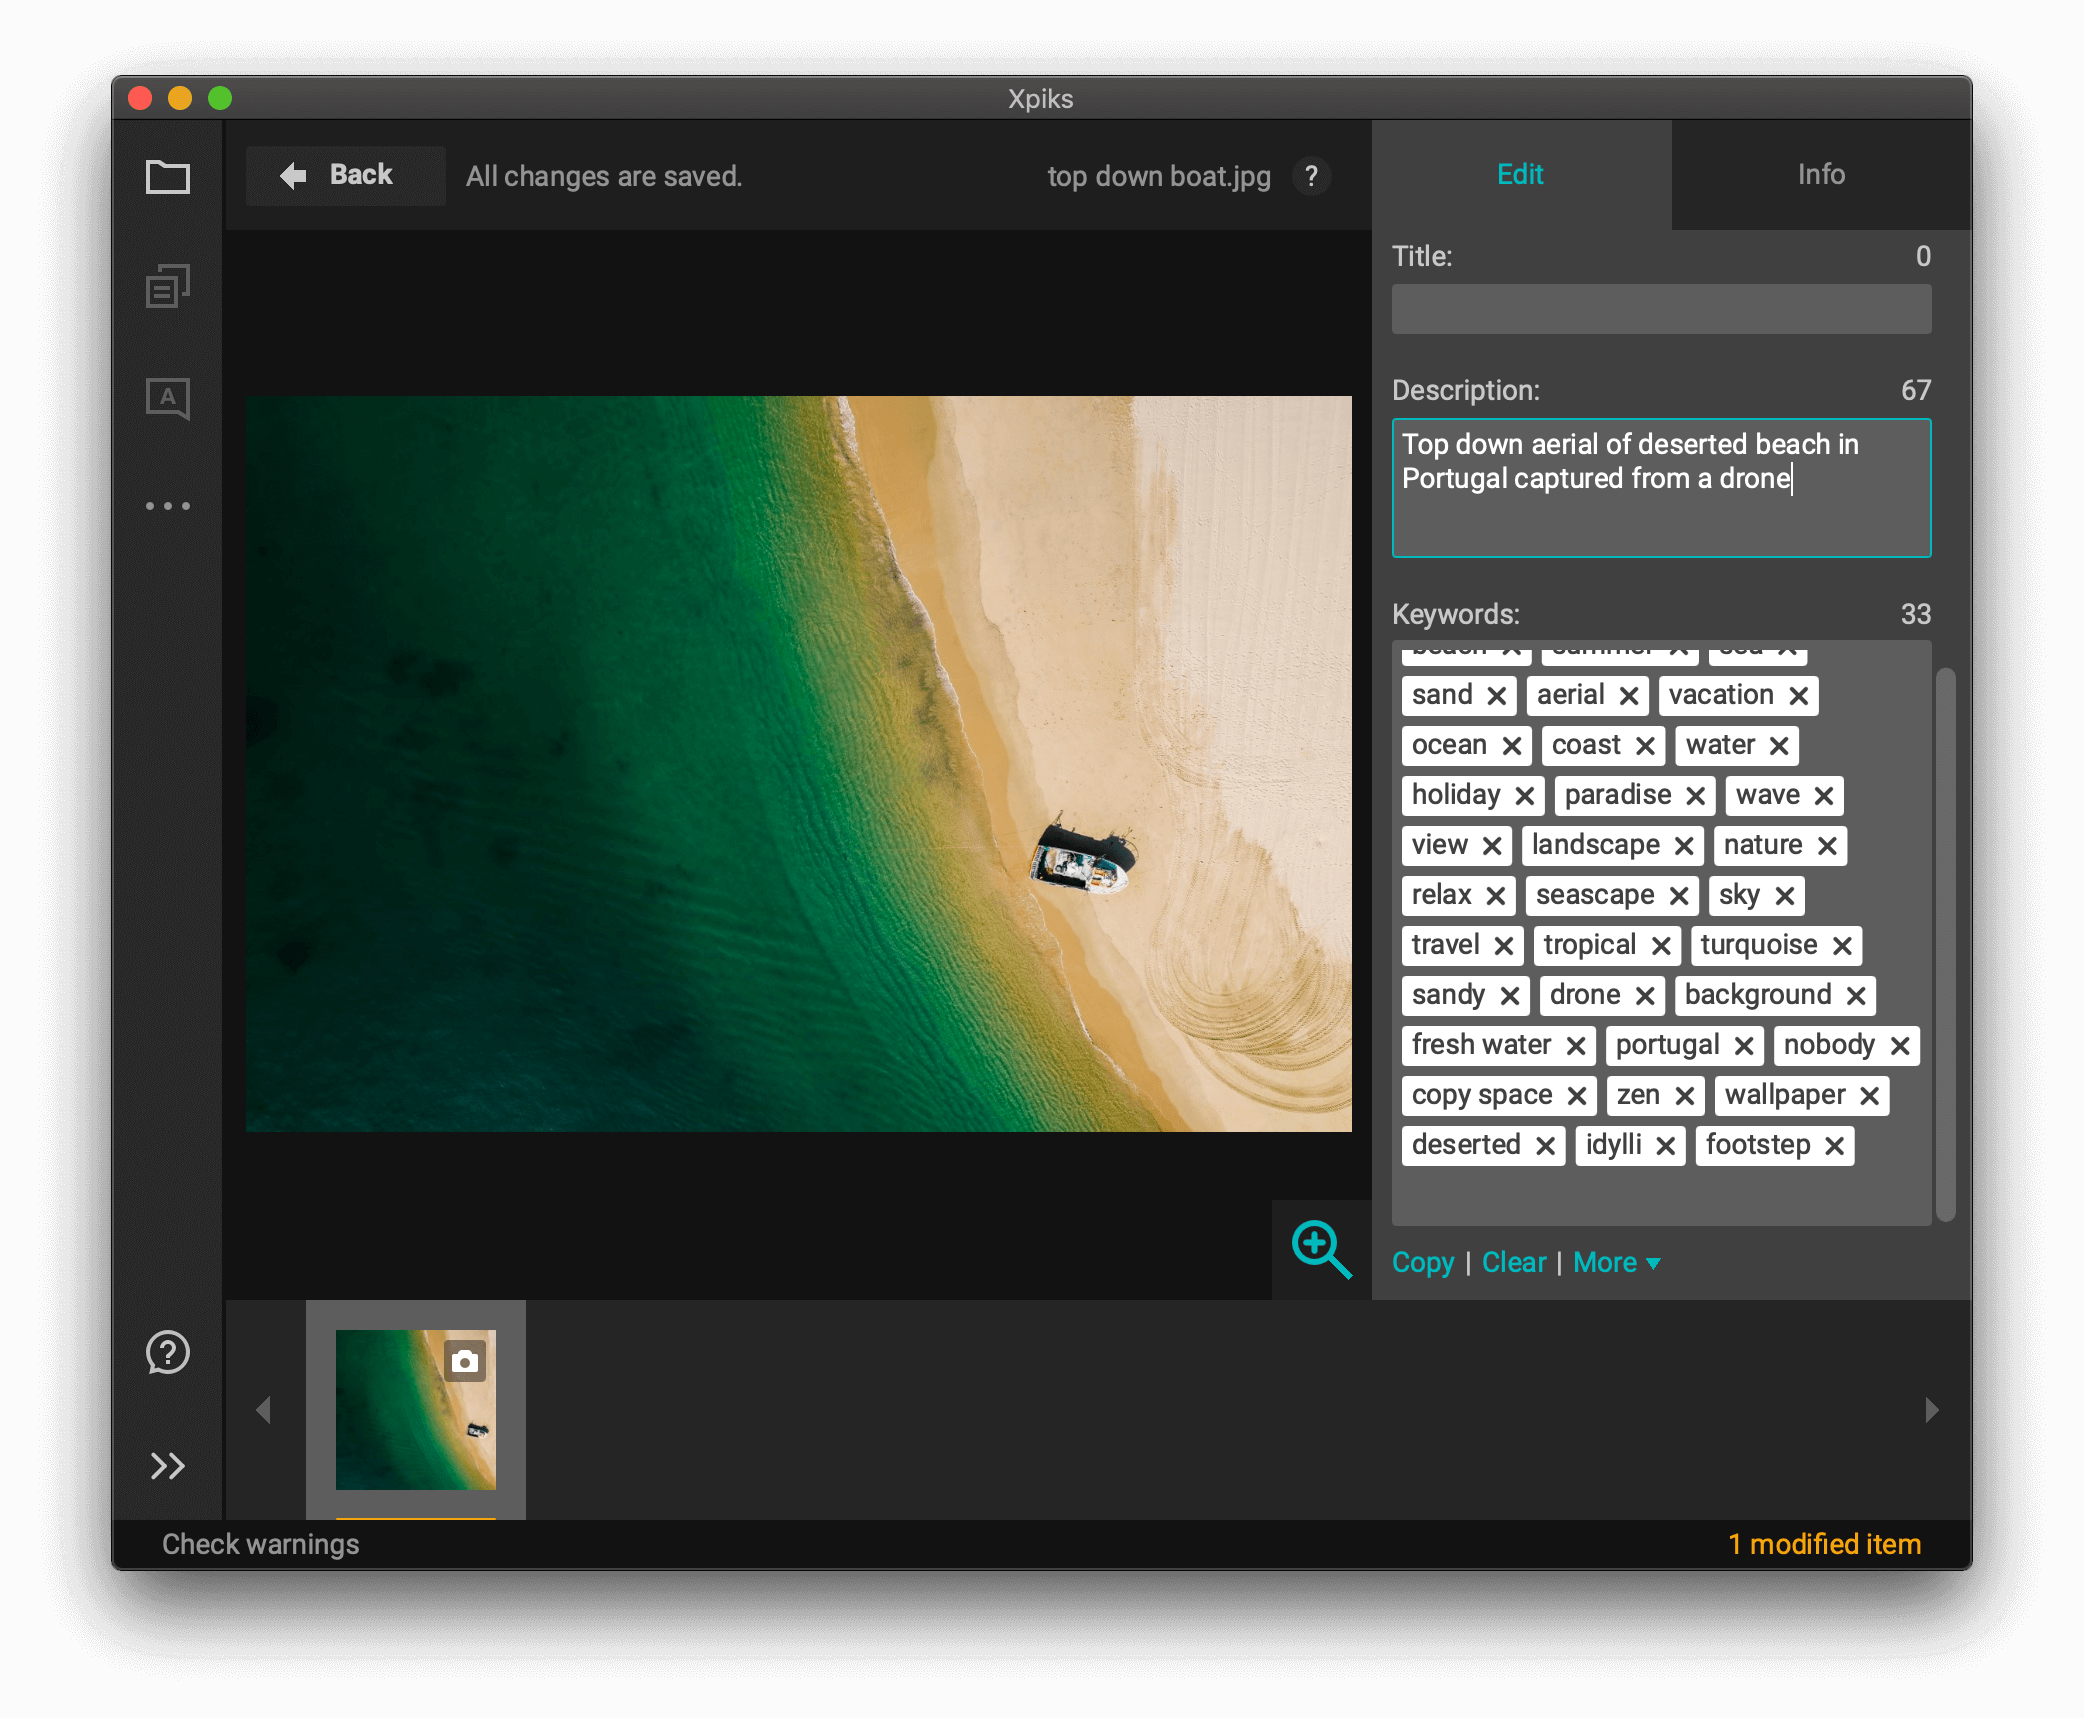
Adding keywords and descriptions to video in Xpiks
If you’re going to start producing aerial content, your keywording workflow will inevitably need to adapt as some of the moves are specific to aerials (see Learn the Basic Moves). You’ll be wise to include the type of movement you’ve made into the keywords as those are what buyers are often searching.
Perhaps there will be multiple moves in one clip and then you’ll include them all, such as a clip that begins as a “top down” and then “tracks” a subject and “reveals” a landscape as seen in the following example.
Lastly, if you’re creating a “hyperlapse”, it’s important to mention that in the keywords. Same if it’s a “real-time” video which will consist of the vast majority of your videos.
Licensing as Commercial or Editorial
Whether I submit as commercial or editorial depends on the individual clip, notably whether there are identifiable people, property and/or logos. Fortunately, when the drone is quite high (30metres and up) it’s almost impossible for people to be recognizable, so the clips can, at least in theory, be uploaded as commercial. Worst case, an agency will reject and you’ll have to resubmit at editorial which is no big deal.
As for logos and writing, this may be trickier to remove but is possible using Adobe Premiere. If it’s too much trouble, just submit as editorial using the correct caption and description.
How much have I made from drone video sales
Perhaps I left the most interesting piece of information for last - how much I’ve earned from licensing my drone content. Before I get started, I must stress that footage tends to take quite a bit longer to begin selling than images, so you must be patient!
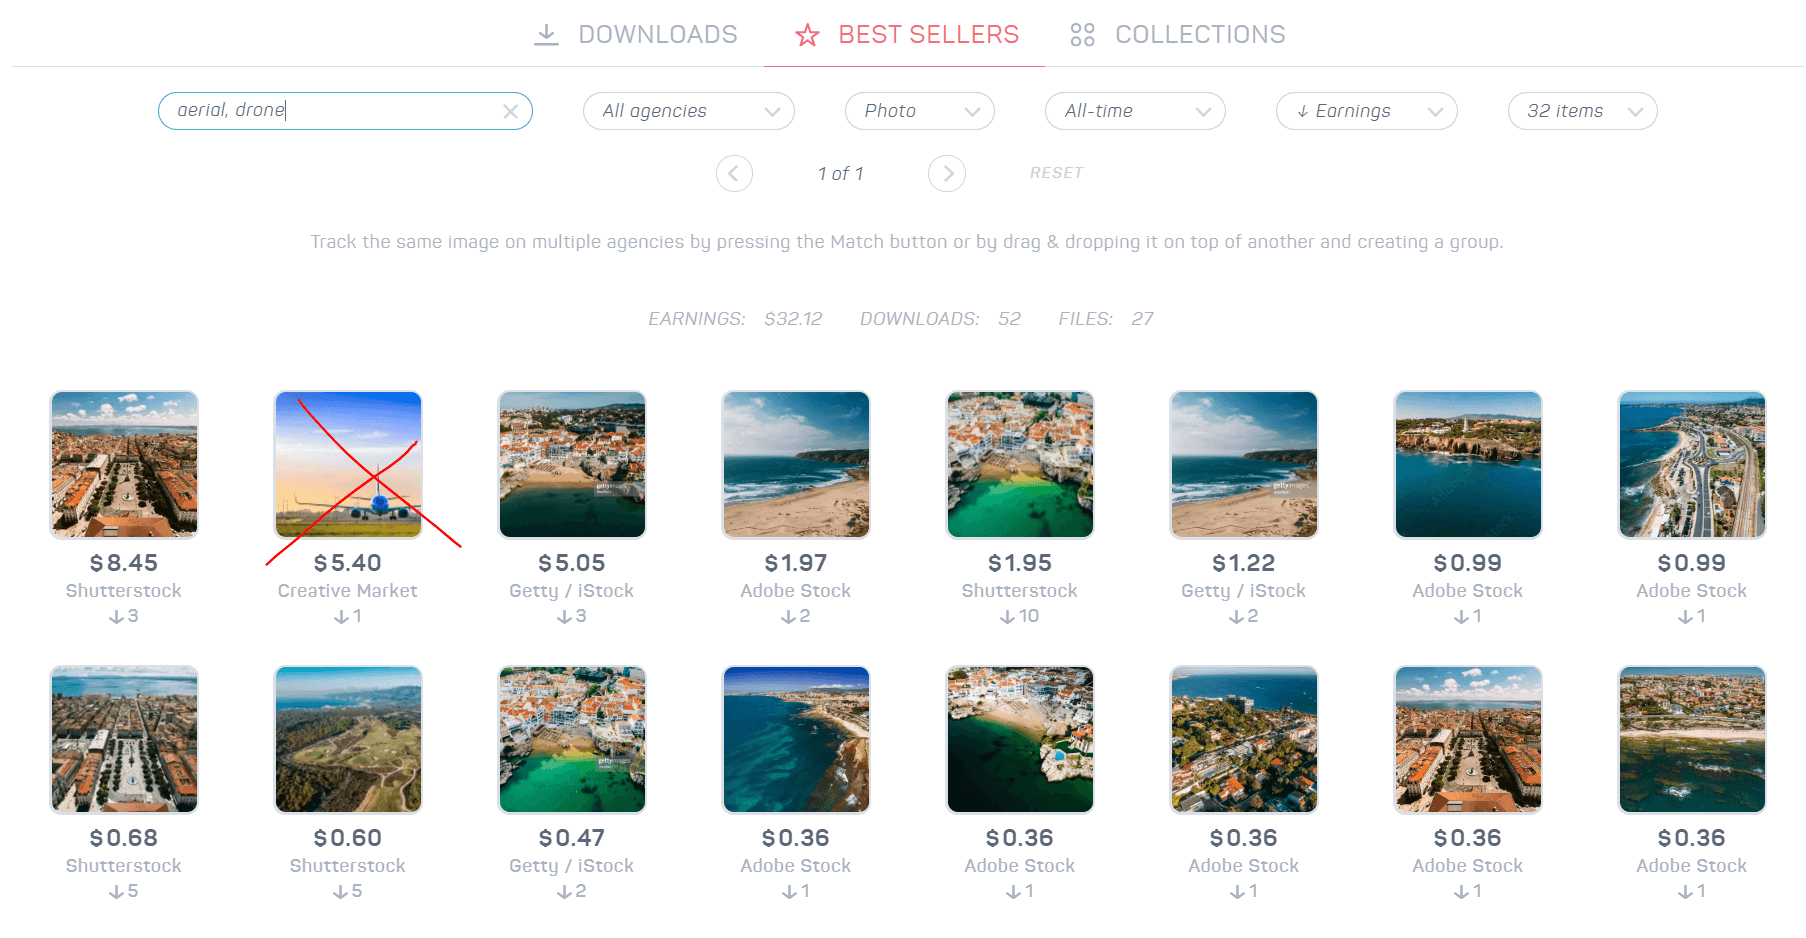
I religiously track my which types of content sell best using Microstockr software which I highly recommend. Tracking earnings is a useful exercise since you may want to return to the same location and try variations, such as different times of the day and moves.
After 6+ months, I’ve only had a handful of significant drone footage sales. Coincidentally, many have only begun showing up in the past two months which suggests that I’ll begin having more sales from 2023 onwards:
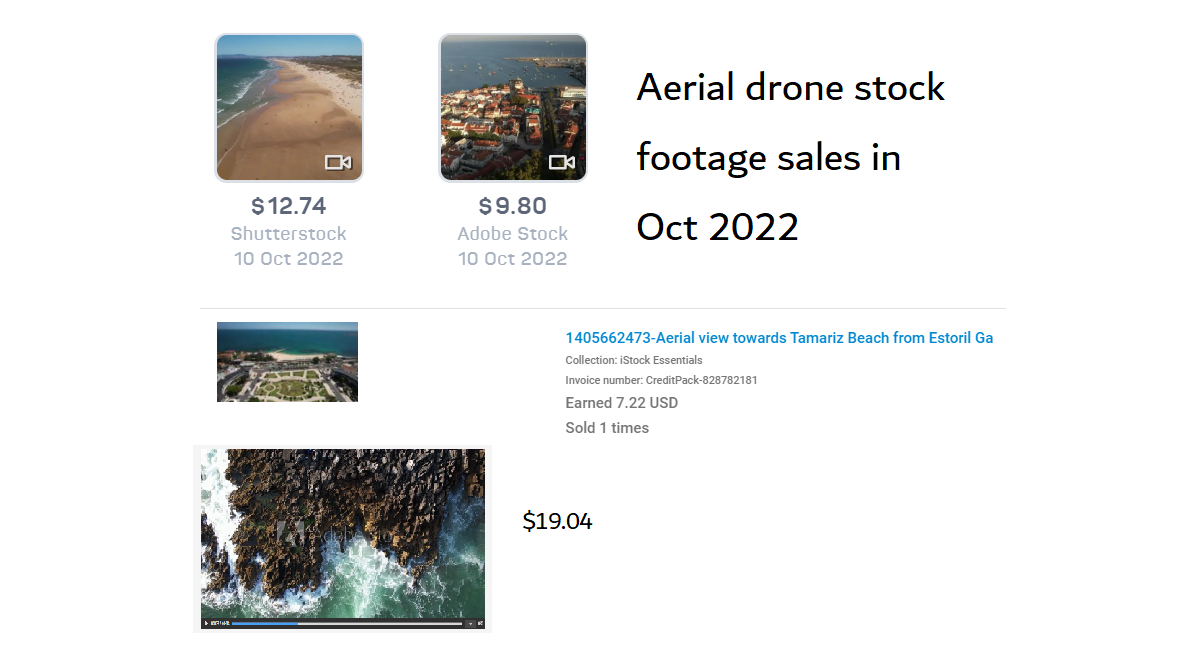
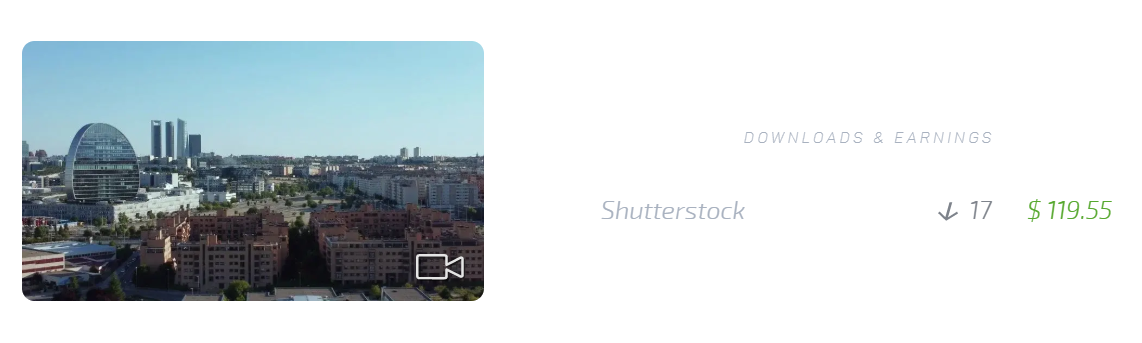
However, one clip which was captured on my friend’s DJI Mini 2 drone while in Madrid in 2021 has already sold 17 times on Shutterstock.
As for stills, sales have been much more regular, but of course the average sale price is considerably lower than footage. So far, only earning me enough for a lunch and with the way inflation is these days, perhaps just a small breakfast. It’s early days though and fully expect these sales to pick up.
However, as mentioned earlier, one of my motivations for a larger drone with a larger sensor are for higher-resolution images. If you’ve been following me for a while, you’ll know that I upload book covers to Arcangel Images. One such top-down image has recently been used on a book cover earning me many hundreds of dollars and well on the way to paying off my initial drone investment.
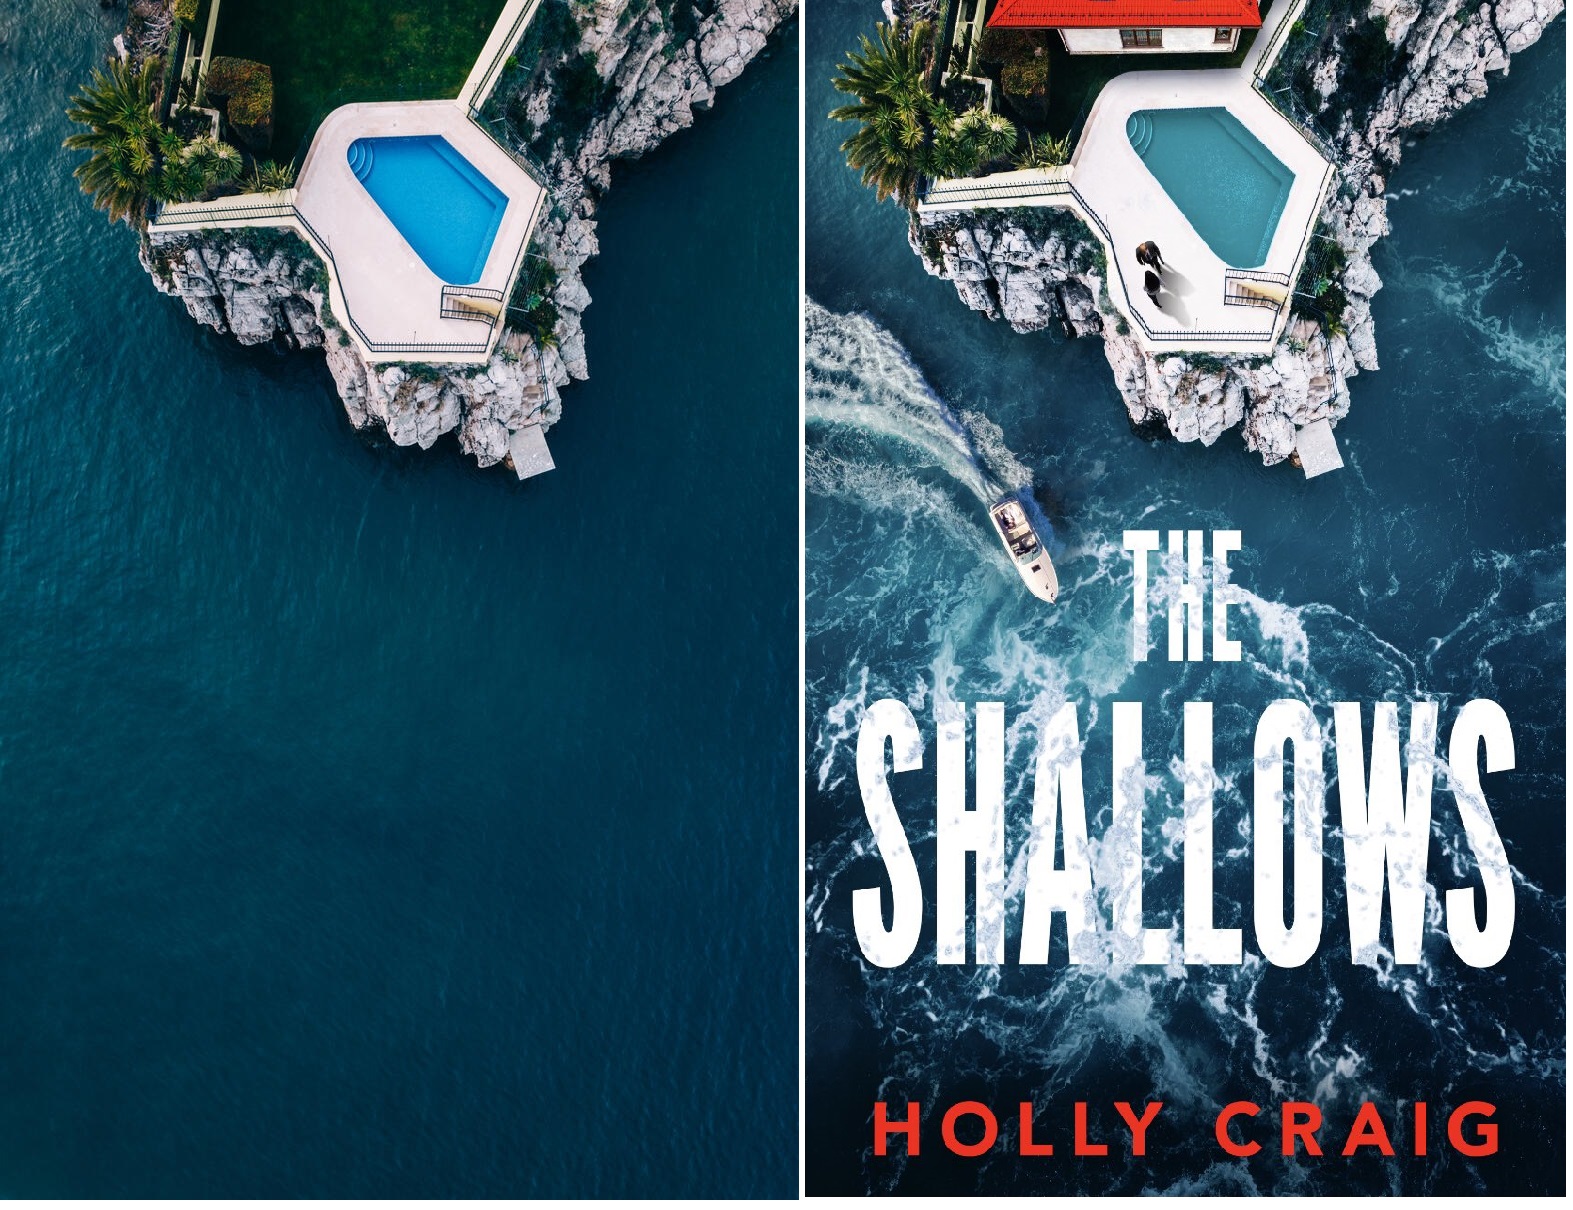
My drone photo used for a book cover
Conclusion
Starting on your drone adventure in late-2022 is both exciting and scary! But if you take the necessary prudence to choose which would be a suitable type of drone for you, get your paperwork in order, fly safely, learn the basic moves and keyword to a high standard, then you’ll be well on your way to earning residual income.
The good news is that as it’s a new type of imagery, only possible previously via renting expensive helicopters, there is relatively less competition than terrestrial content. Should you begin now you’ll be ahead of the game as in just a few years’ time the air will likely be crowded with other drones and thus more competition on all agencies. In addition, regulators are increasingly becoming more stringent, so soon will prove more difficult to fly where you want to get that great shot.
Until next time and safe flights!